How to Make Your Own Skin in the Minecraft Skin Editor

How to Make Your Own Skin in the Minecraft Skin Editor
Minecraft is a popular sandbox game where you can make things like SMPs, Gigantic Builds, RPG Realms, Redstone Machines, etc. But have you heard that you can make your own skin in Minecraft? The answer is, “Yes!” You can customize the in-game default skins, Steve or Alex, or you can also make your own skin in Minecraft using the Skin Editor.
As Minecraft fans know, there are two versions of the game, Bedrock and Java editions, available online to download. In the former, Minecraft players can use the in-game feature to customize their skin, whereas the latter doesn’t feature any in-game skin editor. Then comes the Minecraft Skin Editor, through which you can make a custom skin rather than download a used skin from the internet.
In this article, you will get a complete guide to making your own skin in the Minecraft Skin Editor.
How to Make Your Own Skin in Minecraft
Where to Make the Skin
As we have mentioned above, Java Edition doesn’t have a feature by which you can create a custom skin for your character in Minecraft. Therefore, you can use various Skin Editor sites on the internet. We recommend you use Minecraft Skindex to make your own skin in Minecraft.
In Bedrock Edition, you can visit the ‘Profile’ section displayed on the main screen, and then you can customize the skin of default characters by clicking on the edit characters option.
Steps to make your own Skin in Minecraft

Here are the steps you can follow to make your own skin in Minecraft Java Edition:
Step 1: First, open the Skindex website with the given link here. You will be directed to the skin editor page where you can make your own skin from scratch.
Step 2: At this point, you can paint your skin pixel by pixel. You can either paint on a full body or you can separately paint each body part, choosing your choice of colors.
Also, you can use the Auto Tone feature to automatically change the shade of each pixel to give the skin a more natural glow.
Step 3: After making the skin, you can download the skin as a PNG file on your devices or computers by tapping the Download button.
How to Apply the Skin in Minecraft:
Step 4: After downloading the skin on your computer, open the Minecraft application on your device.
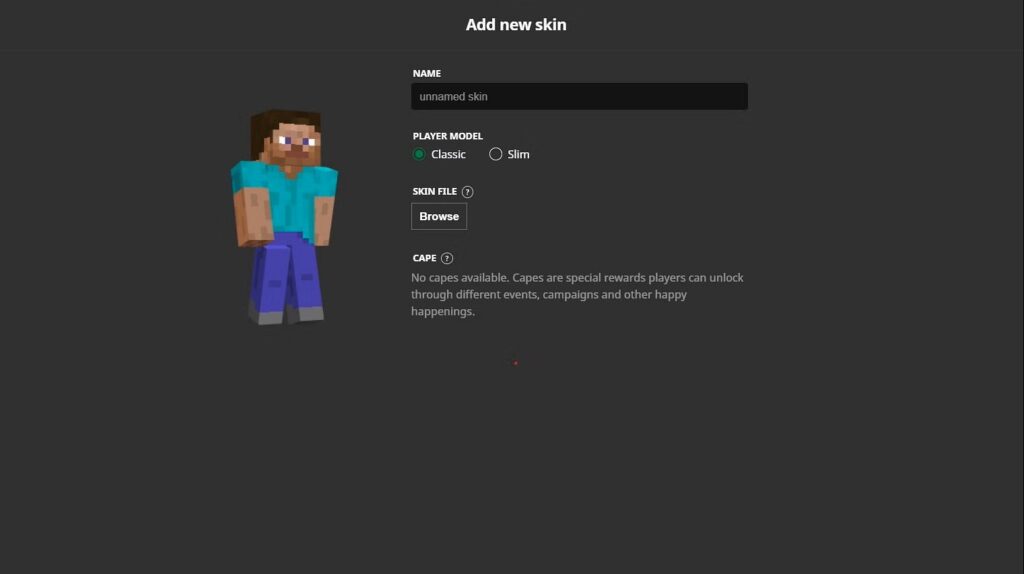
Step 5: Now, open the Skins tab on the main screen, and a new window will pop up.
Step 6: In the new window, click the new skin button. Afterward, you can browse your computer for the downloaded skin (a PNG file).
Step 7: Finally, the file will be uploaded to the Minecraft server, and you are ready to use the customized skin by clicking on the continue button.
Also Read: